Using the modified app versions is a good thing, but it reckons as a tiredness once, which becomes a time to get switched. Hard to see you go from the WhatsApp Plus app 🙁; sad for that! Consequences on their own side, you must be finding a way to make the switch done properly. The below article we are sectioning to make your Switch from WhatsApp to WhatsApp Plus without a bit of data loss.
You are going to get all your old data you had on WhatsApp Plus in the exact way within the official WhatsApp Messenger after switching to our method.
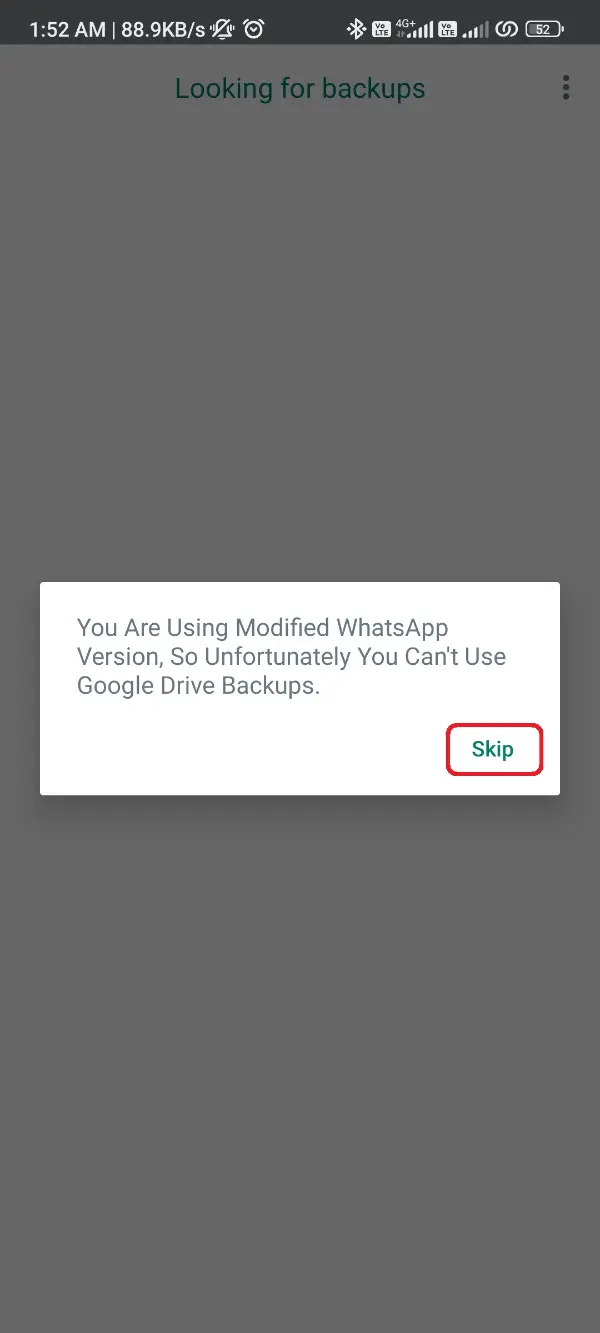
If you have already used the WhatsApp Plus before, you must remember that the Google Drive backup feature isn’t an option for WhatsApp Mods. We’re in the same case at the current moment, and that’s where we need a different method.
There is a solid method to get switched without the cloud backup. Well, we named it solid method because it’s a hard drive backup and restore getting done from your phone’s Internal Storage directly.
It’s a simple copy and paste thing you need to do with a backup folder, and soon you will get the free access to all your messages and media files on the WhatsApp Messenger after that switch.
Method of Switching from WhatsApp Plus to WhatsApp
There are numerous methods to switch from WhatsApp Plus to WhatsApp, where some require third-party software and an additional system, basically a PC or Laptop.
But we would rather not enhance the disturbances or the toughness of procedure. We want you to get this done as fast as you can and with zero errors at all.
That’s only possible with this method of switching from WhatsApp Plus to WhatsApp. The below method is split into three steps, starting with backing up the data and ending up on the transfer complete.
Time to board for the procedure:
Taking Backup of WhatsApp Plus Data
After successful splitting of the procedure, we got first to back up all the data we have in this WhatsApp Plus version to restore it later in the official version, which makes a perfect switch.
Before uninstalling the WhatsApp Plus app, you need to do some tweaks to the app interface in the same way we are taking data backup in WhatsApp for a long time.
Still, the process will help you more delicately:
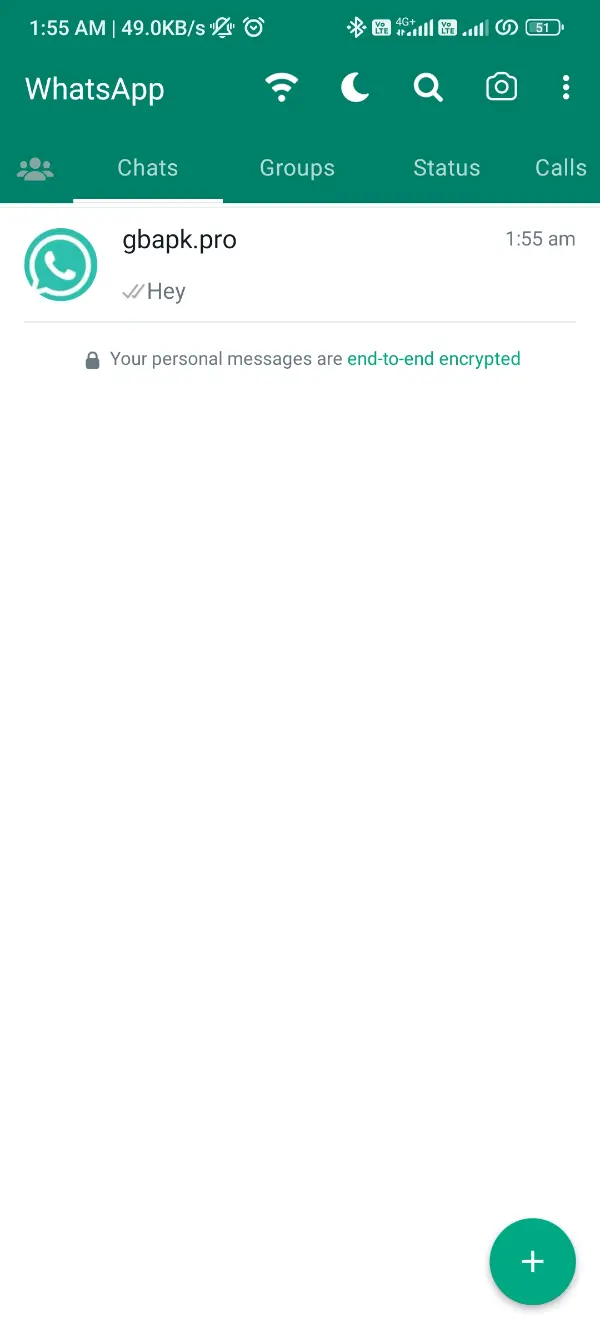
- Launch the WhatsApp Plus app on your smartphone.
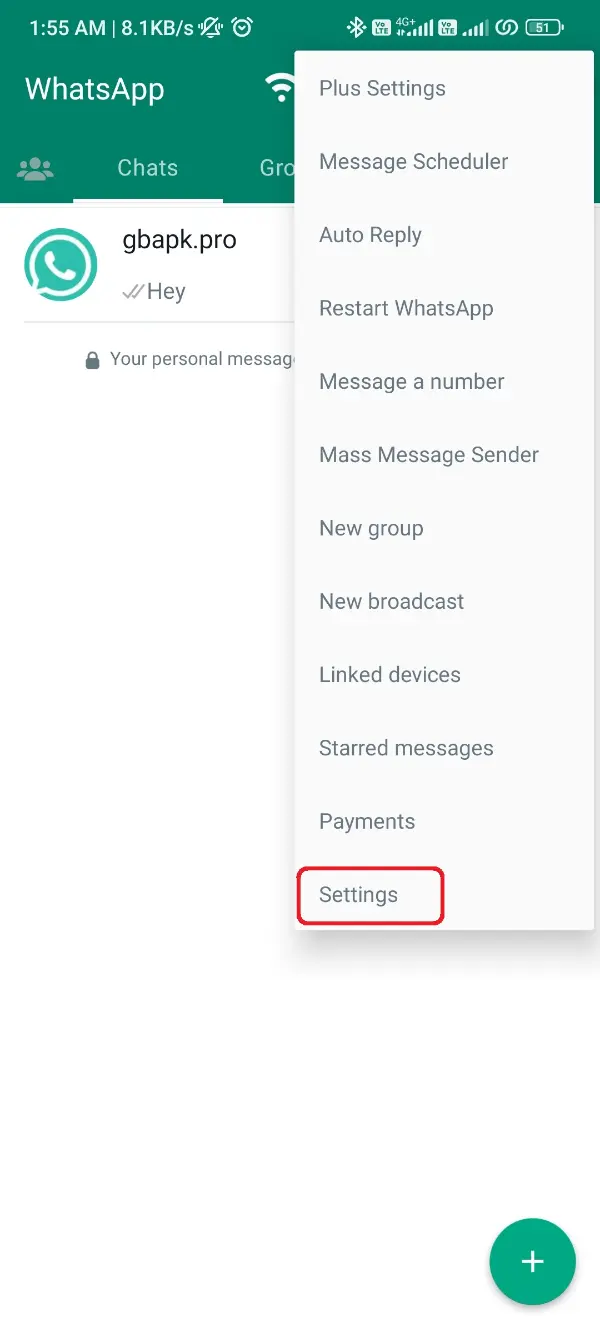
- Click the three-dot icon positioned in the top-right corner of the interface.
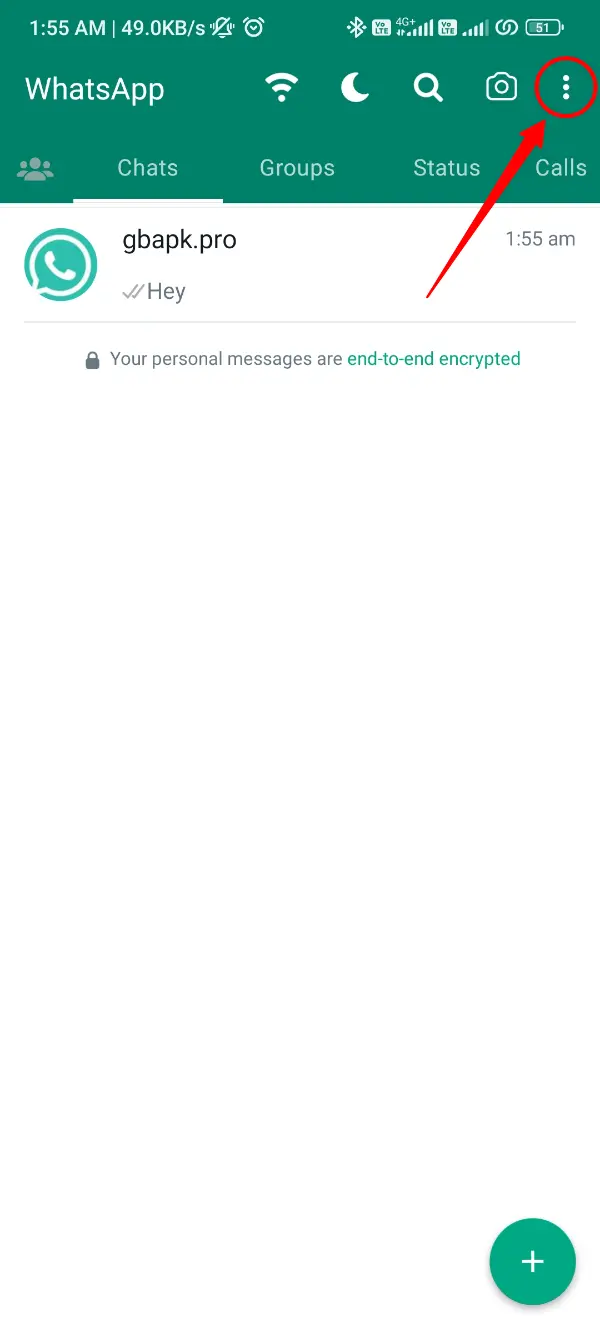
- Select the Settings button from this menu and click it.
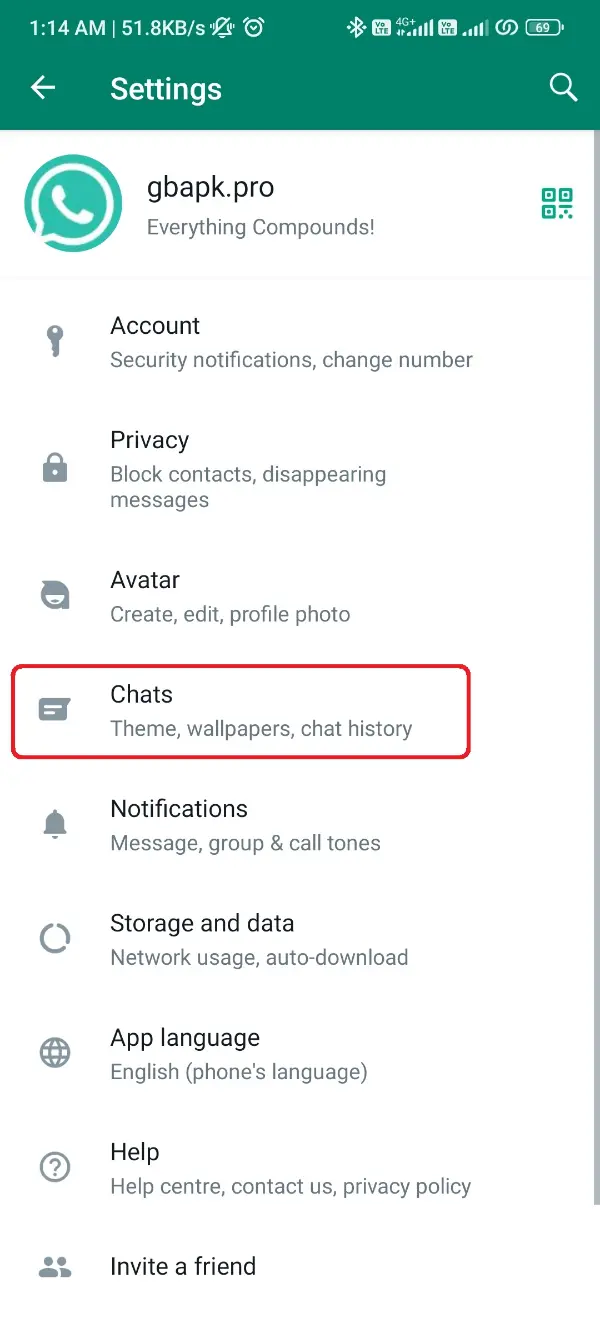
- After entering the Settings, find Chats option and click it.
- Now you’re inside the Chats menu. Scroll down and click Chat Backup button.
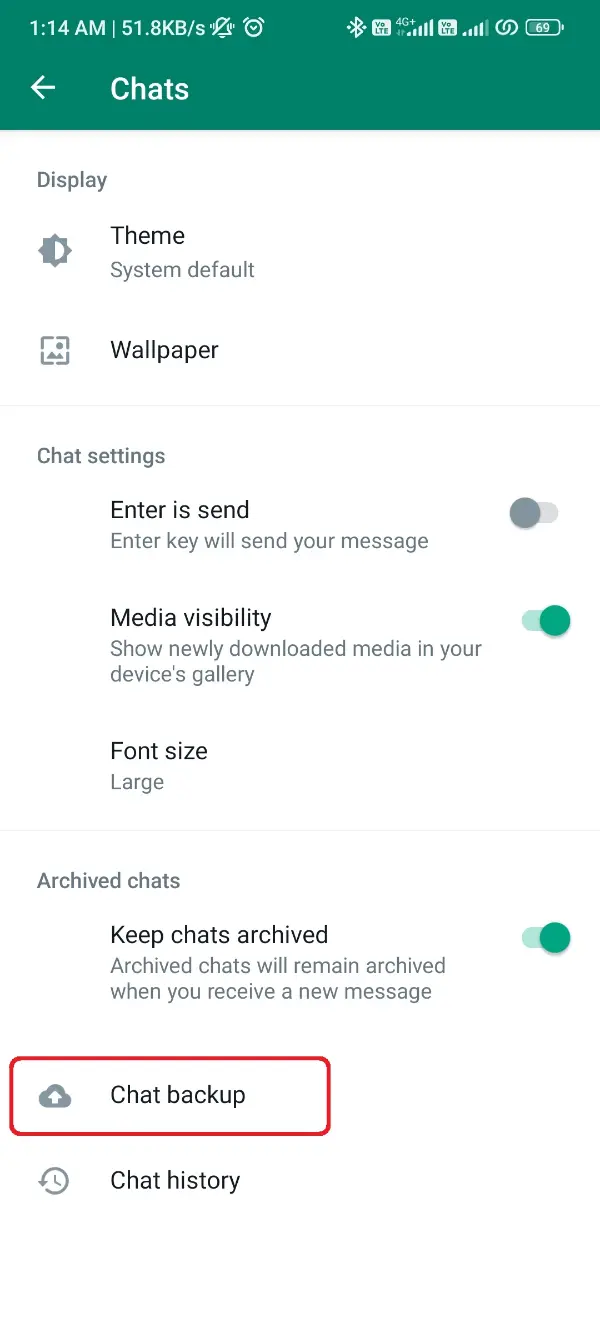
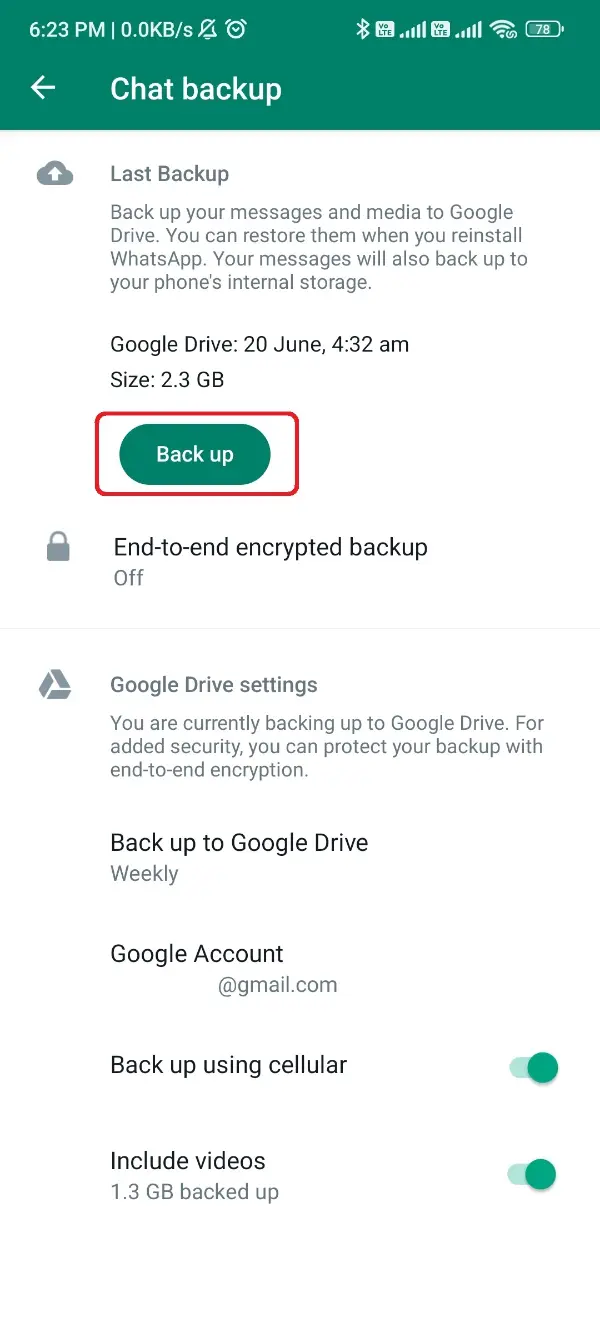
- The backup process will suddenly get started and after some time you’ll see it get completed 100%.
You have successfully backed up all your important data, including the messages, media files, documents, and everything you got or sent via WhatsApp Plus.
Now you need to change that data as per the WhatsApp official app’s codes to let the WhatsApp app confirm that data backup as their own.
Rearranging Data Backup for WhatsApp
Rearranging data backup is the second phase of the process, and it needs you to mark that data backup you created with the name of WhatsApp Plus.
It’d be a convenient phase where you’re only obliged to rename the backup folder from the mod version’s name to the official name.
We won’t let you go on with a little knowledge, and that’s why, listing the important steps below:
- When the first phase is utterly done, open the File Manager app on your phone.
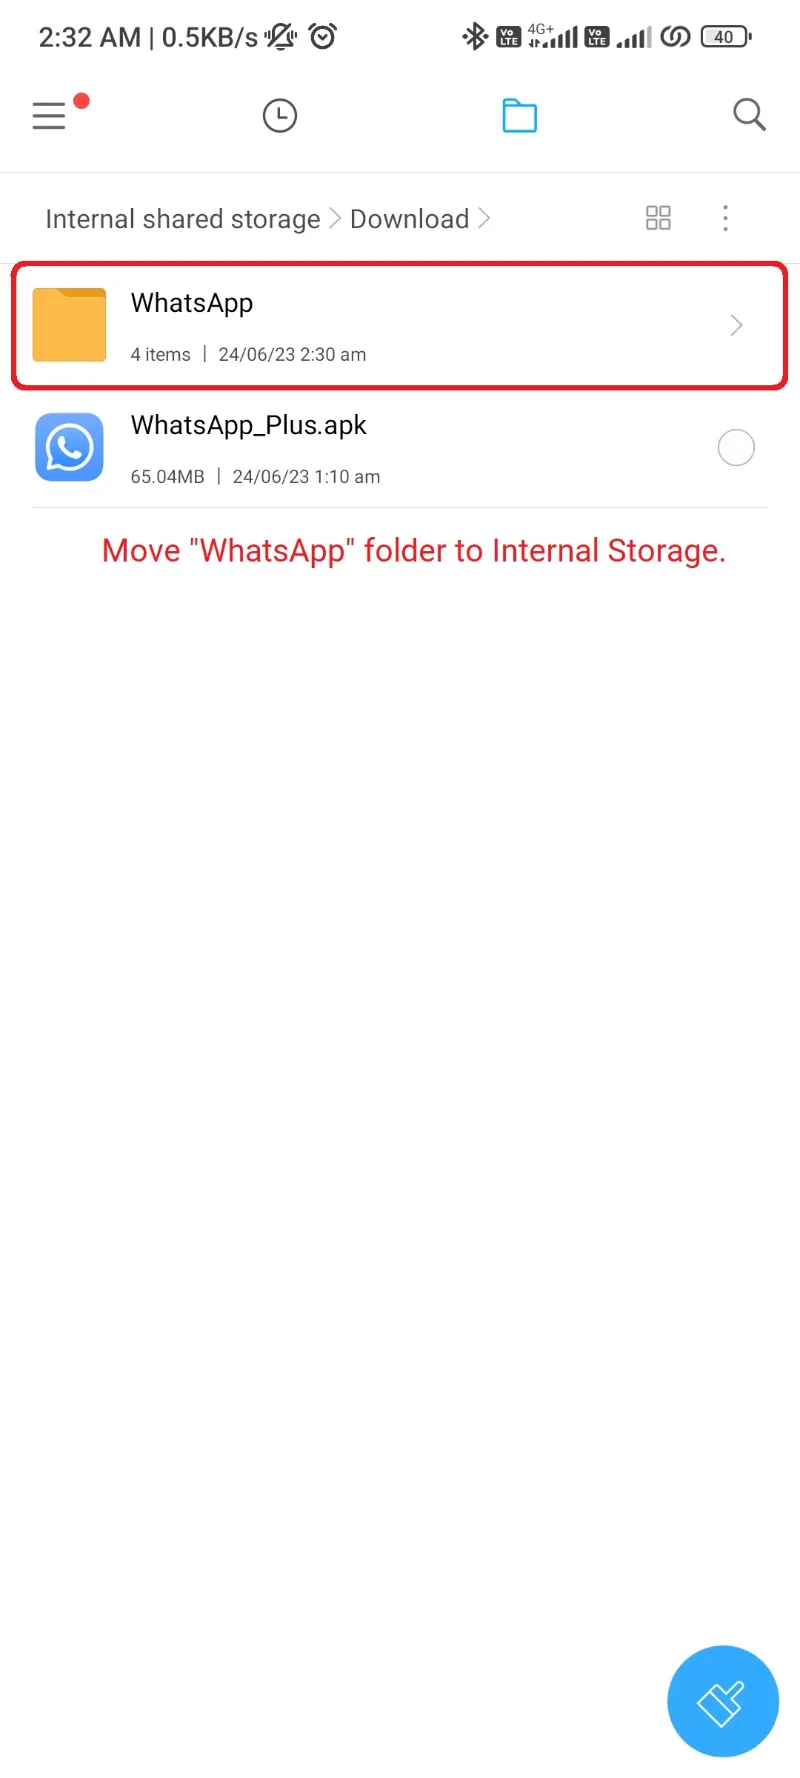
- Scroll down to the root folder of Internal Storage and search for a folder named WhatsApp Plus.
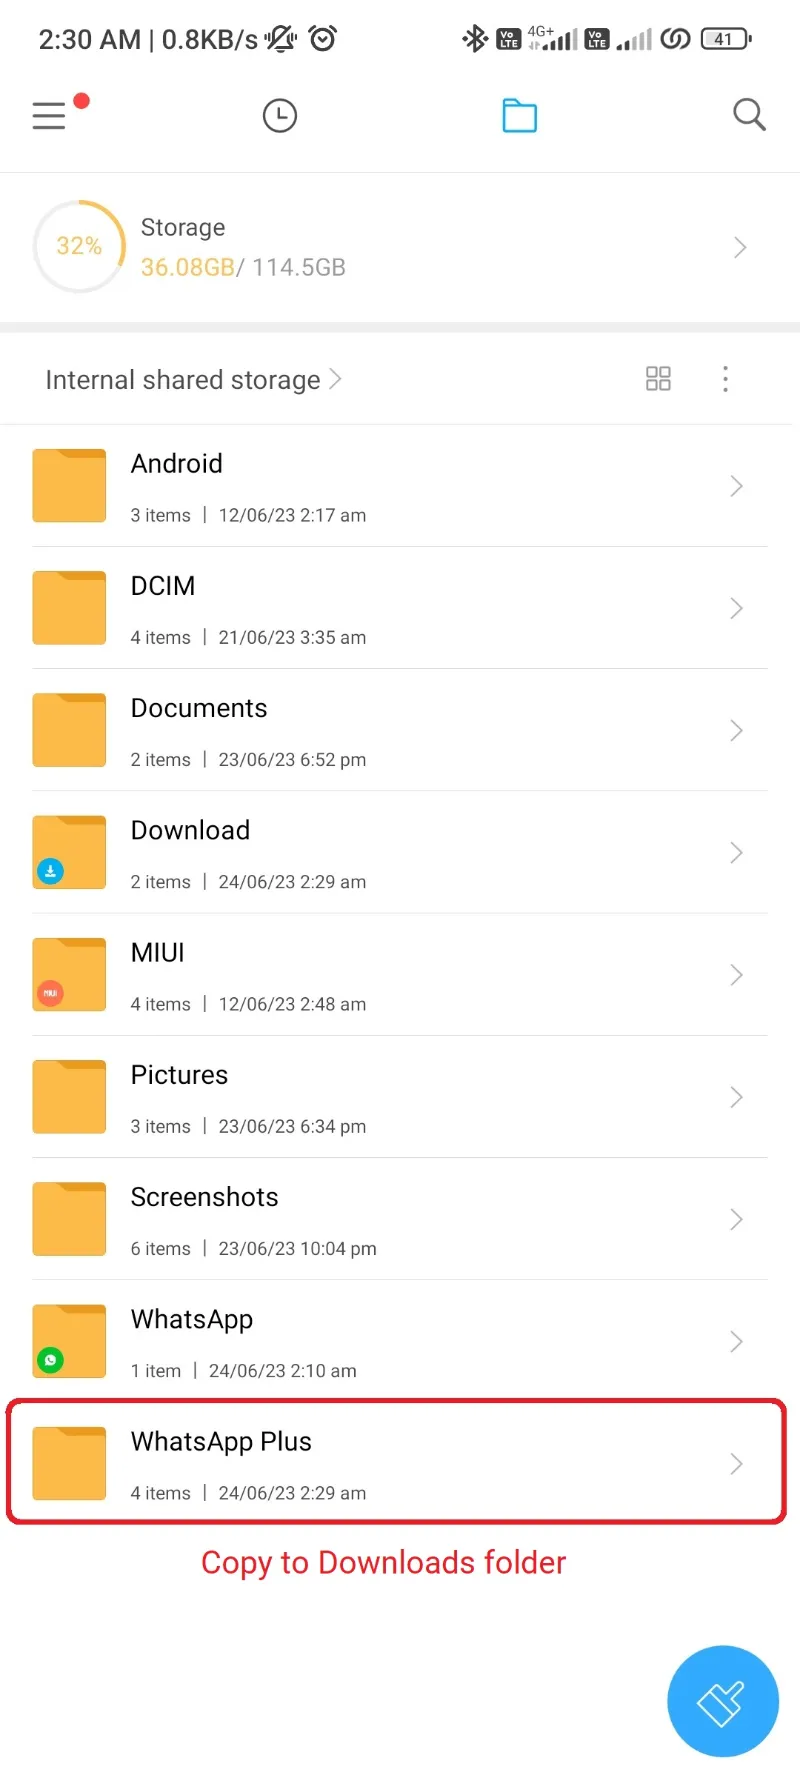
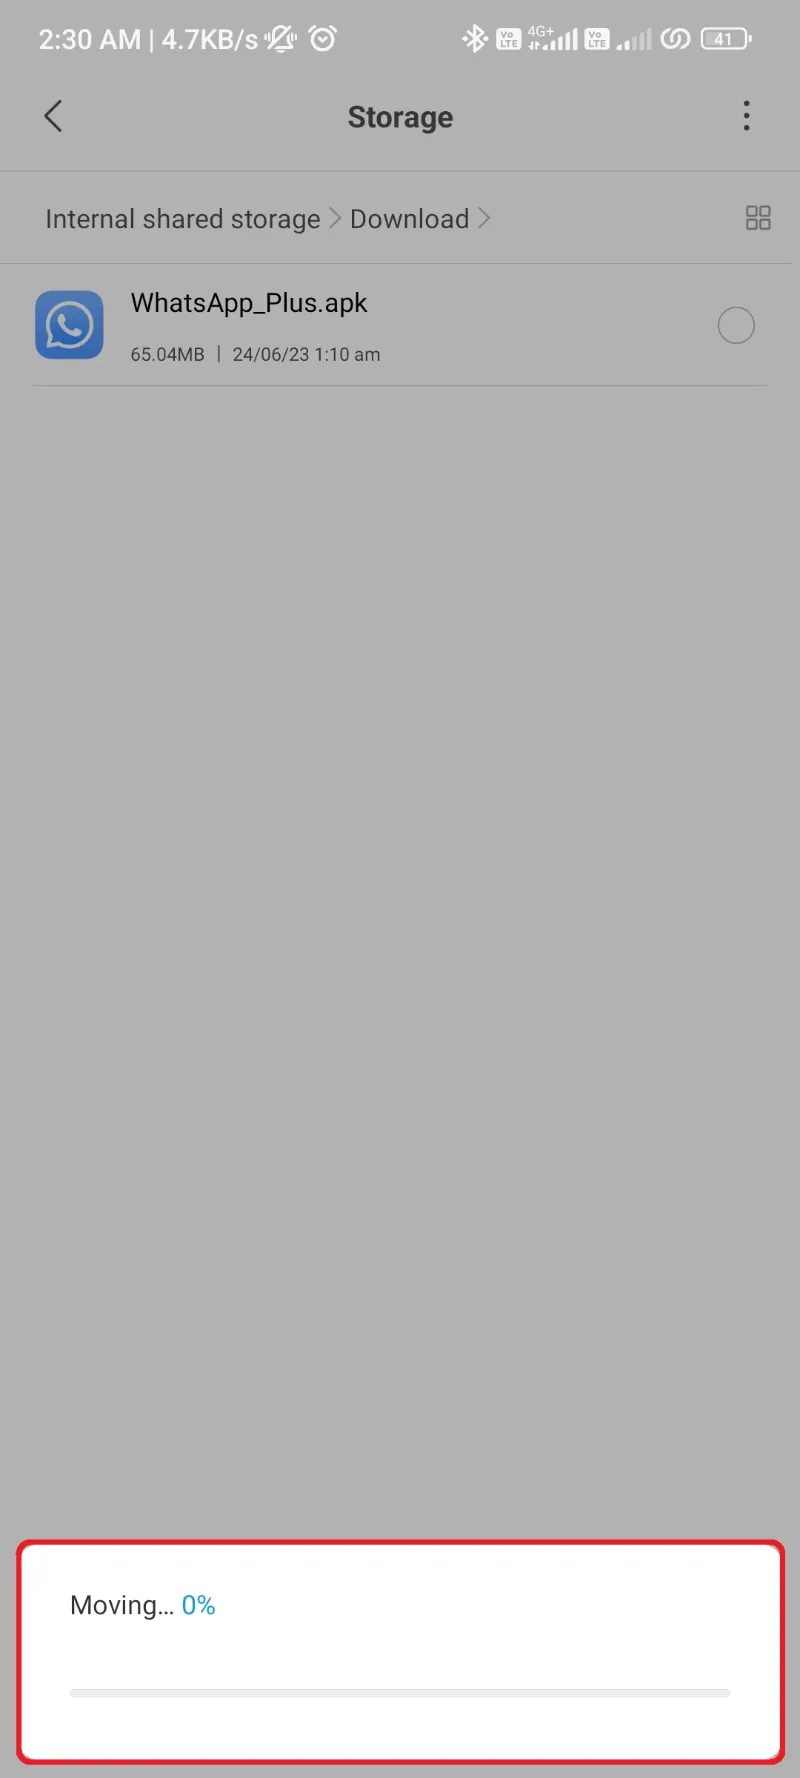
- Copy this folder to the Downloads folder of your phone.
- After copying it, get to the Downloads folder and rename this WhatsApp Plus folder to WhatsApp.
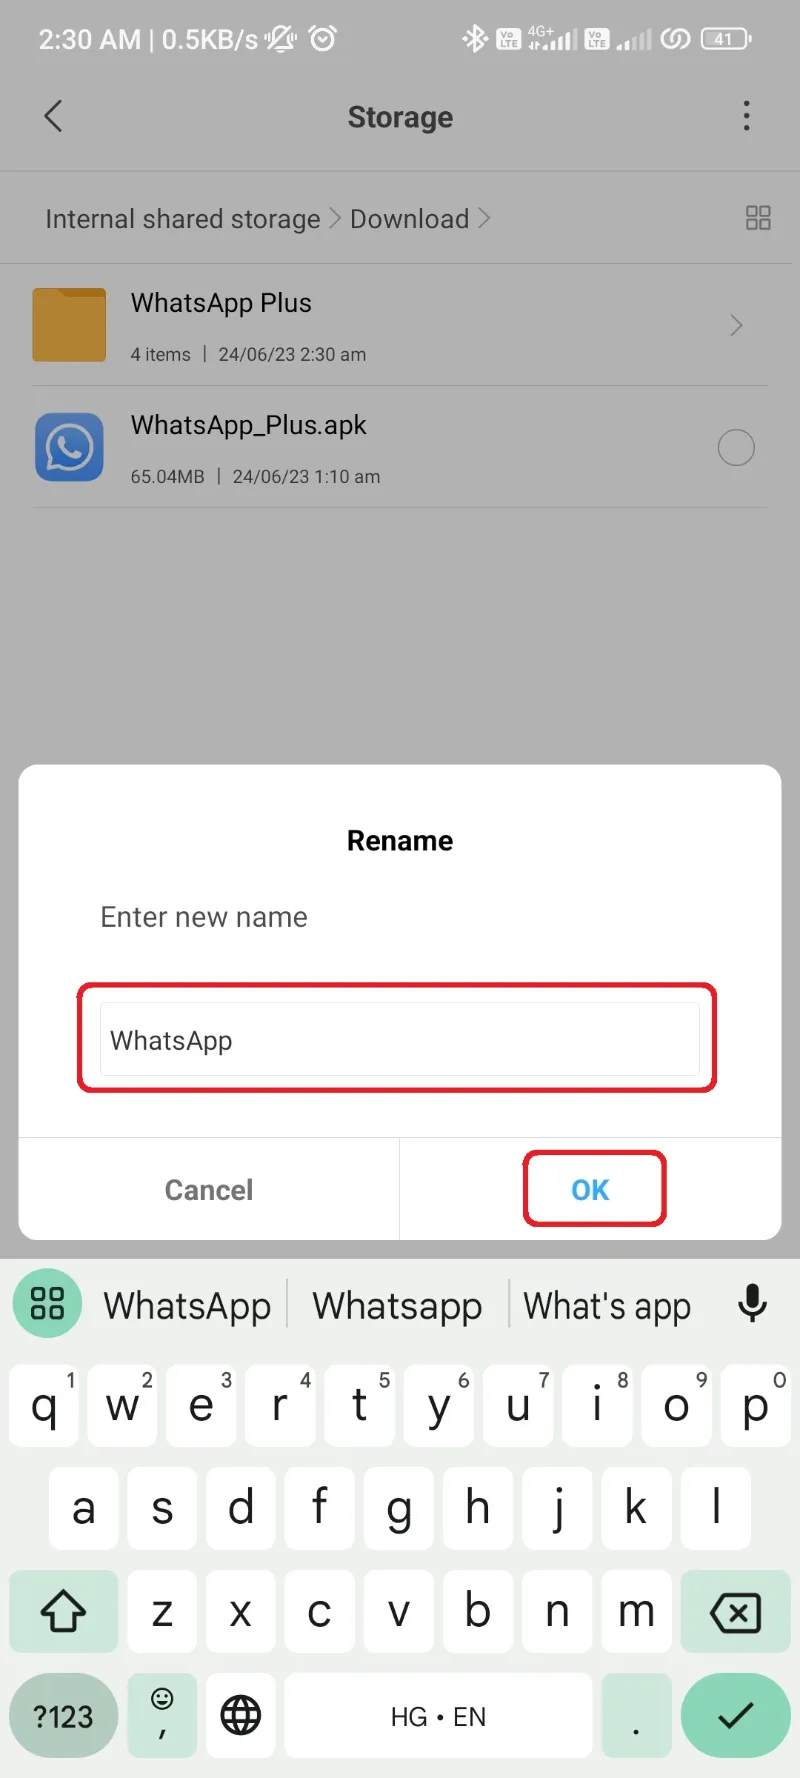
- Consequently, rename all the folders inside this backup folder to WhatsApp from WhatsApp Plus. (I’m talking here about the subfolders, like WhatsApp Plus Images, WhatsApp Plus Documents need to get renamed to WhatsApp Images and WhatsApp Documents respectively.)
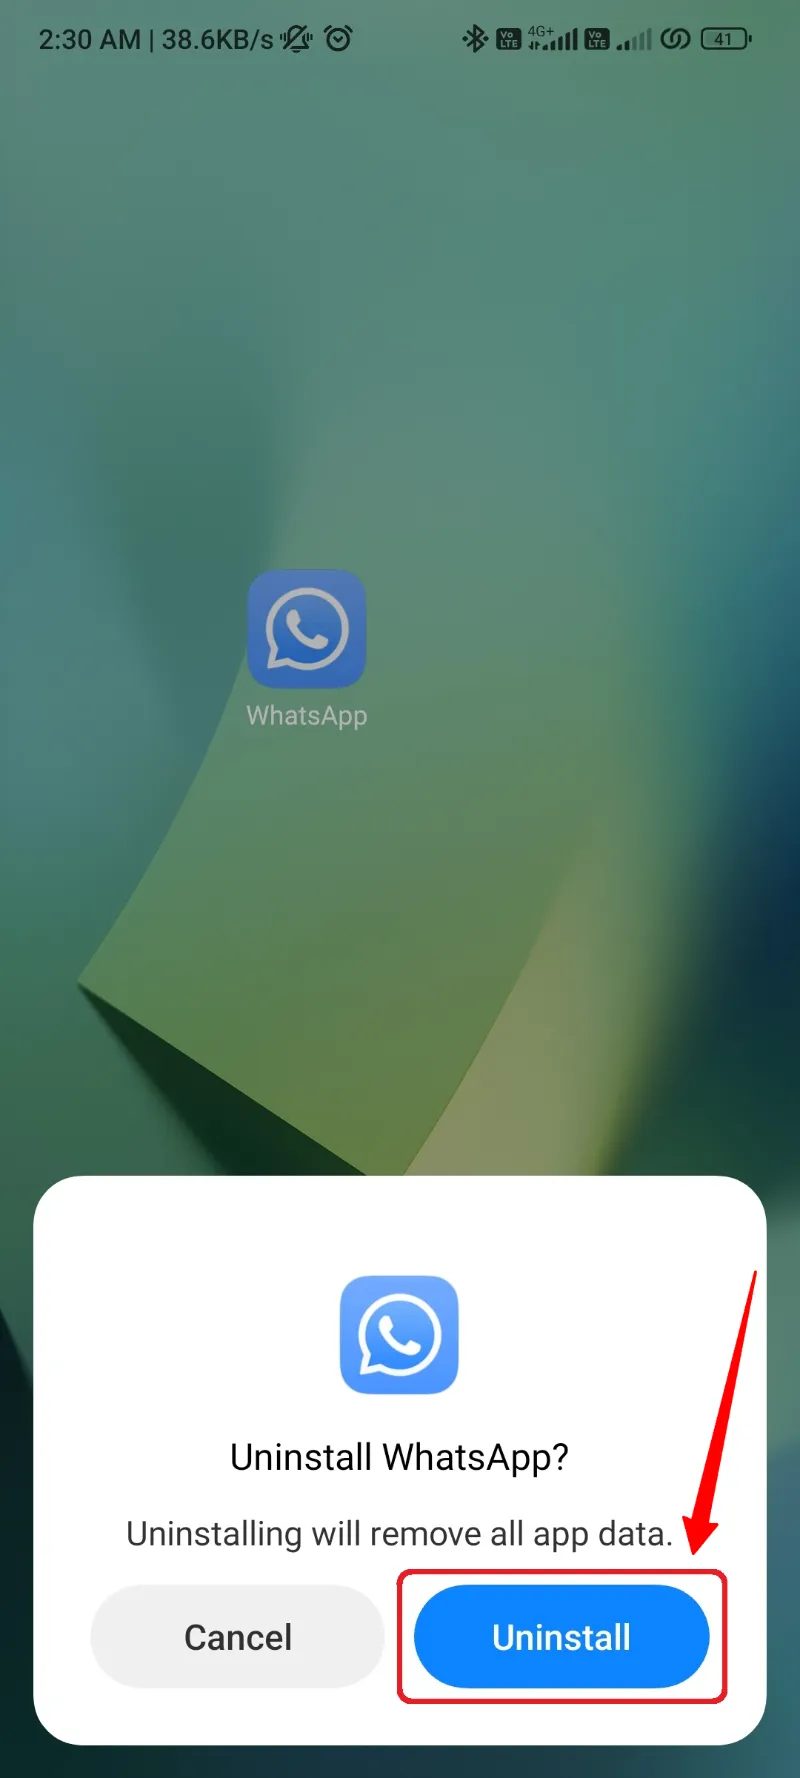
- After completing the renaming procedure for all the subfolders, uninstall the WhatsApp Plus app.
For now, you made a backup, marked it on the name of the official WhatsApp to switch perfectly, and you also have uninstalled the WhatsApp Plus app.
I don’t need to tell you the next and last part of the procedure because you already know about it.
Restoring Data to WhatsApp Messenger
End of the procedure and the prosper switch with all the data of WhatsApp Plus getting transferred to WhatsApp.
It’ll just take one more phase of procedure, and you’ll find yourself on WhatsApp official app with all your old WhatsApp Plus data in an exact way and formation.
Let’s now restore the backup to WhatsApp:
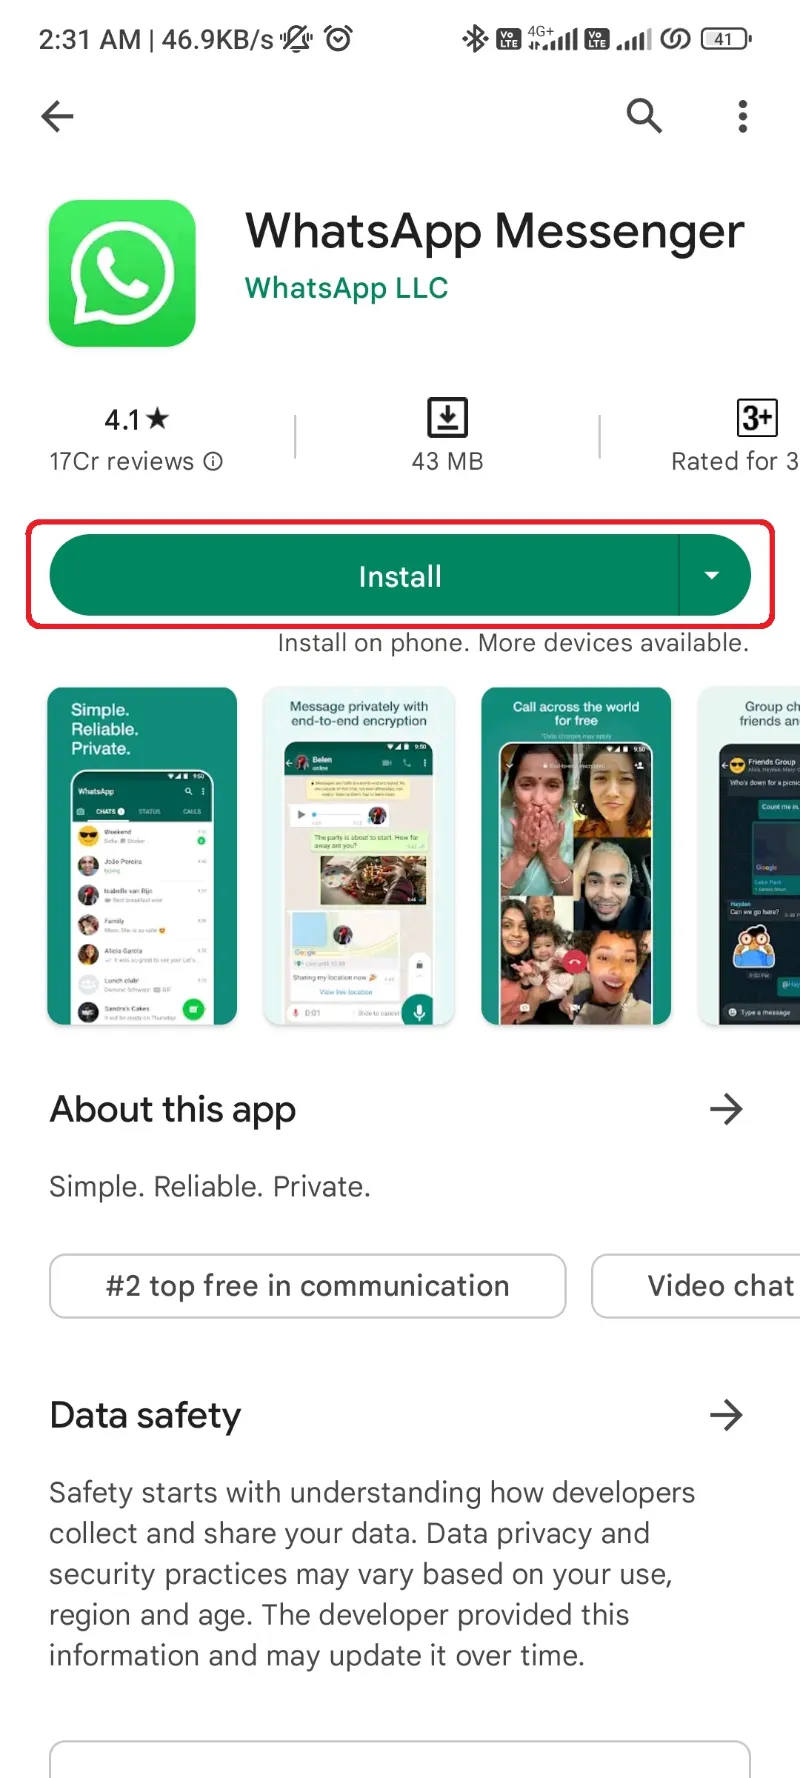
- Open the Google Play Store using this link and download WhatsApp app.
- After successful installation, open the File Manager app on your device before opening WhatsApp.
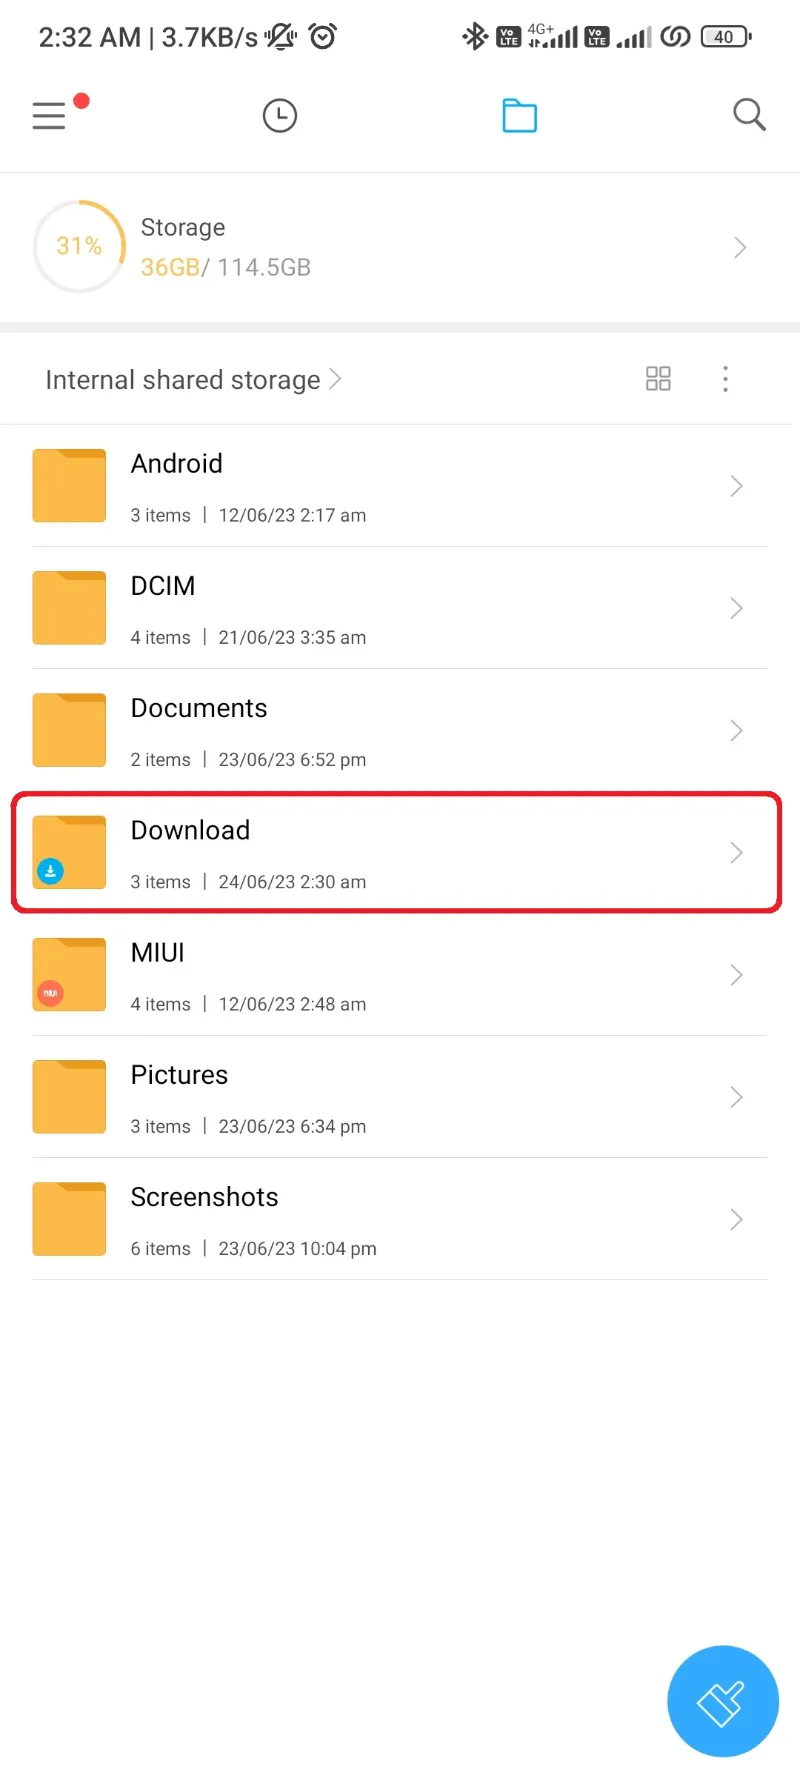
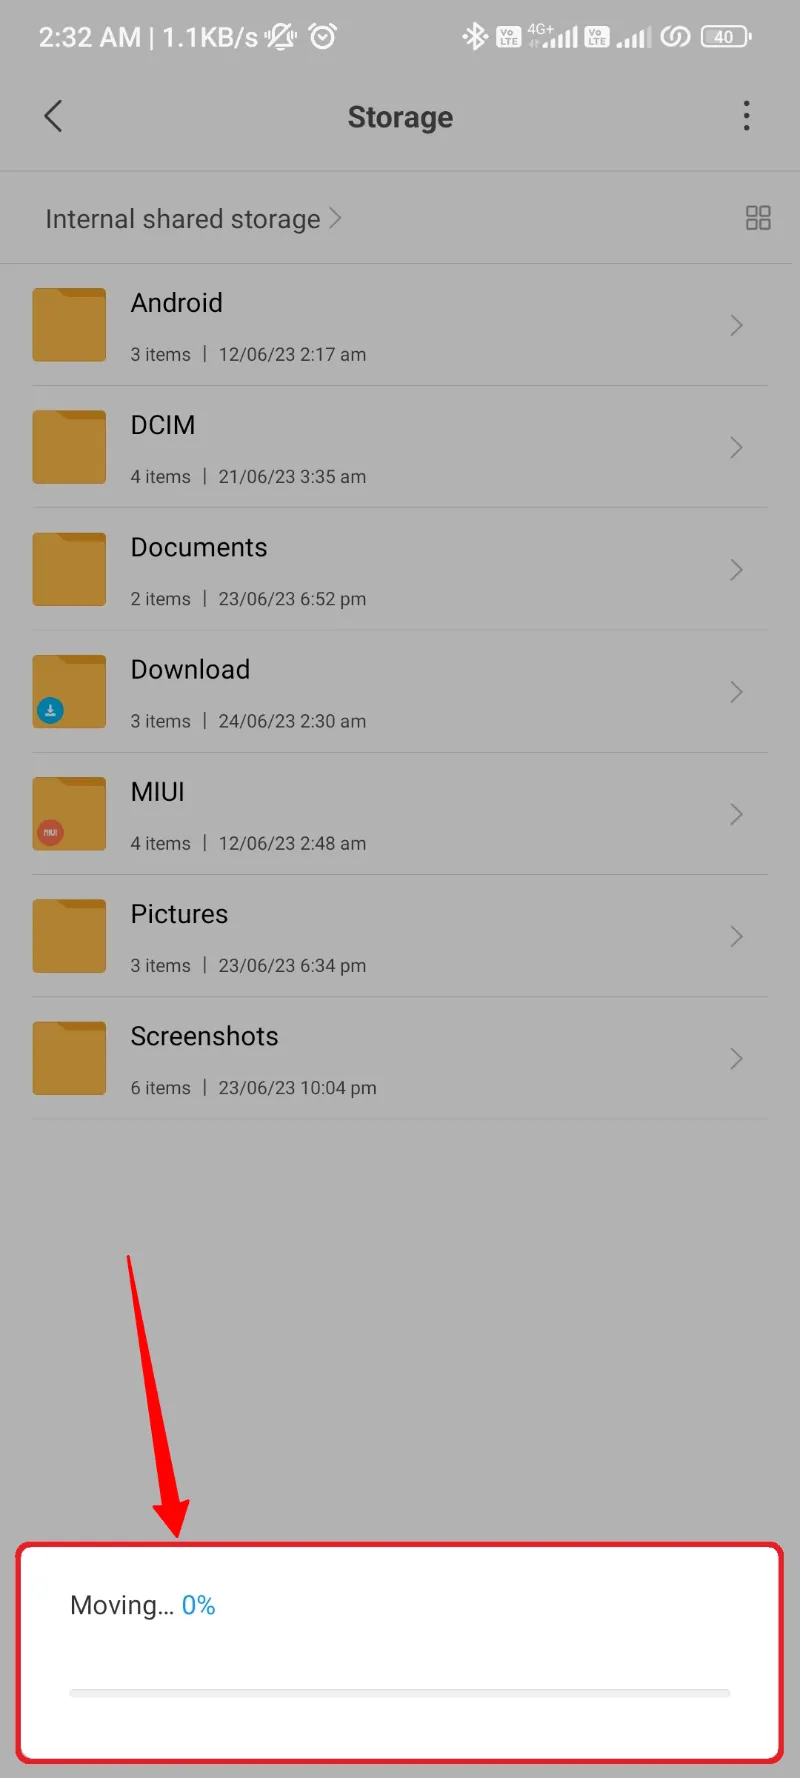
- Locate the WhatsApp backup we created in the Downloads folder in the above second phase.
- Move this WhatsApp folder to the root folder of your device’s Internal Storage.
- Open the WhatsApp app that you recently installed using Google Play Store.

- Fill in all the important details, including your region and WhatsApp number.
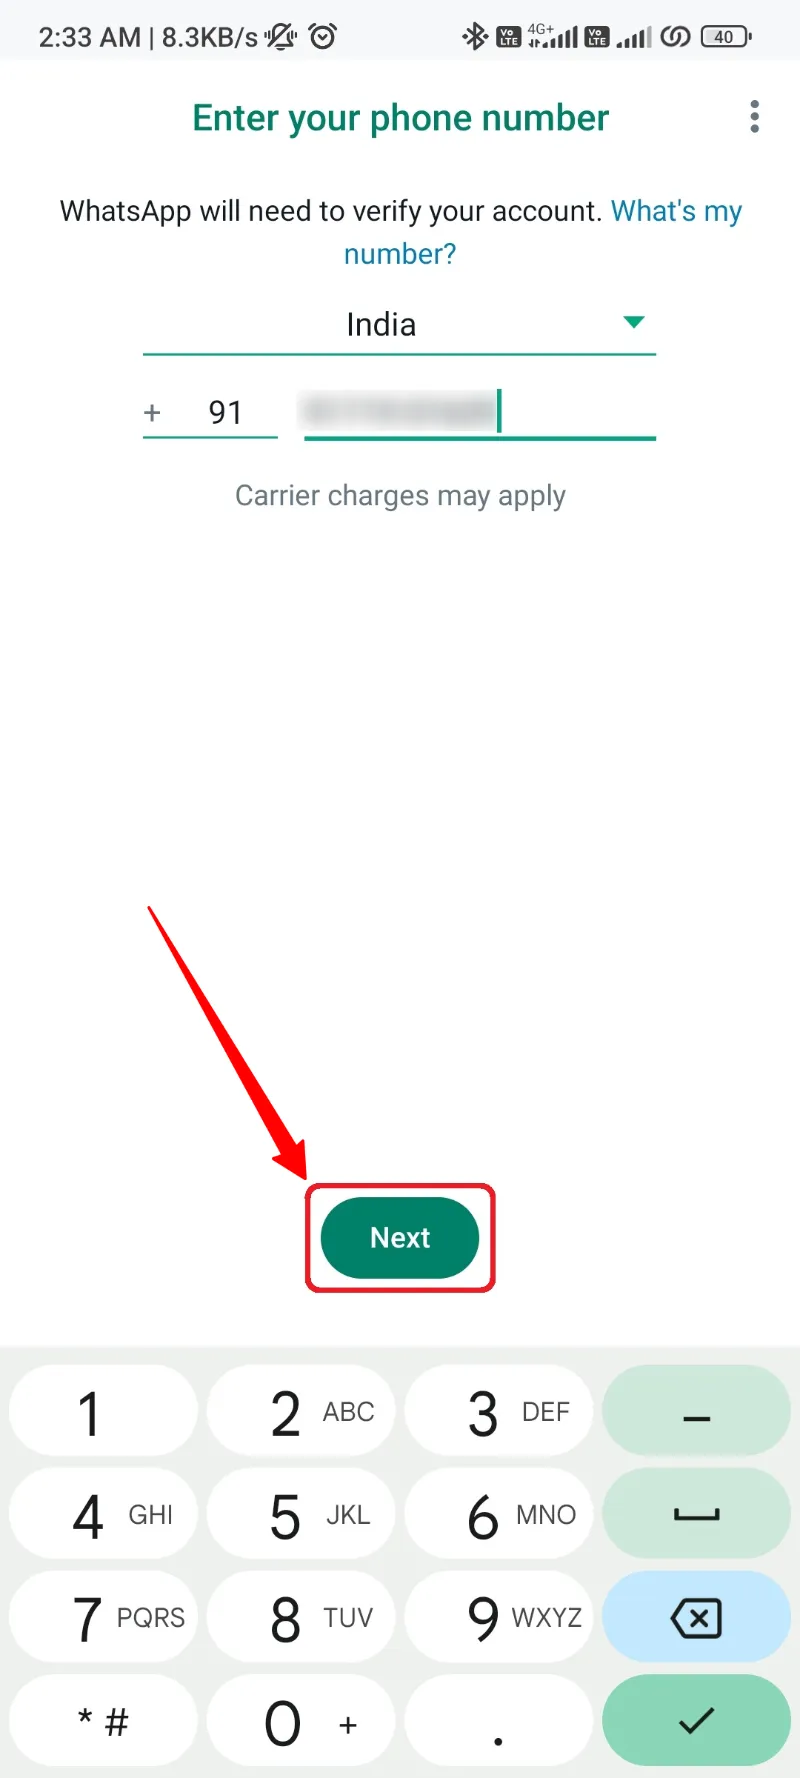
- Click the Verify button to start verification.
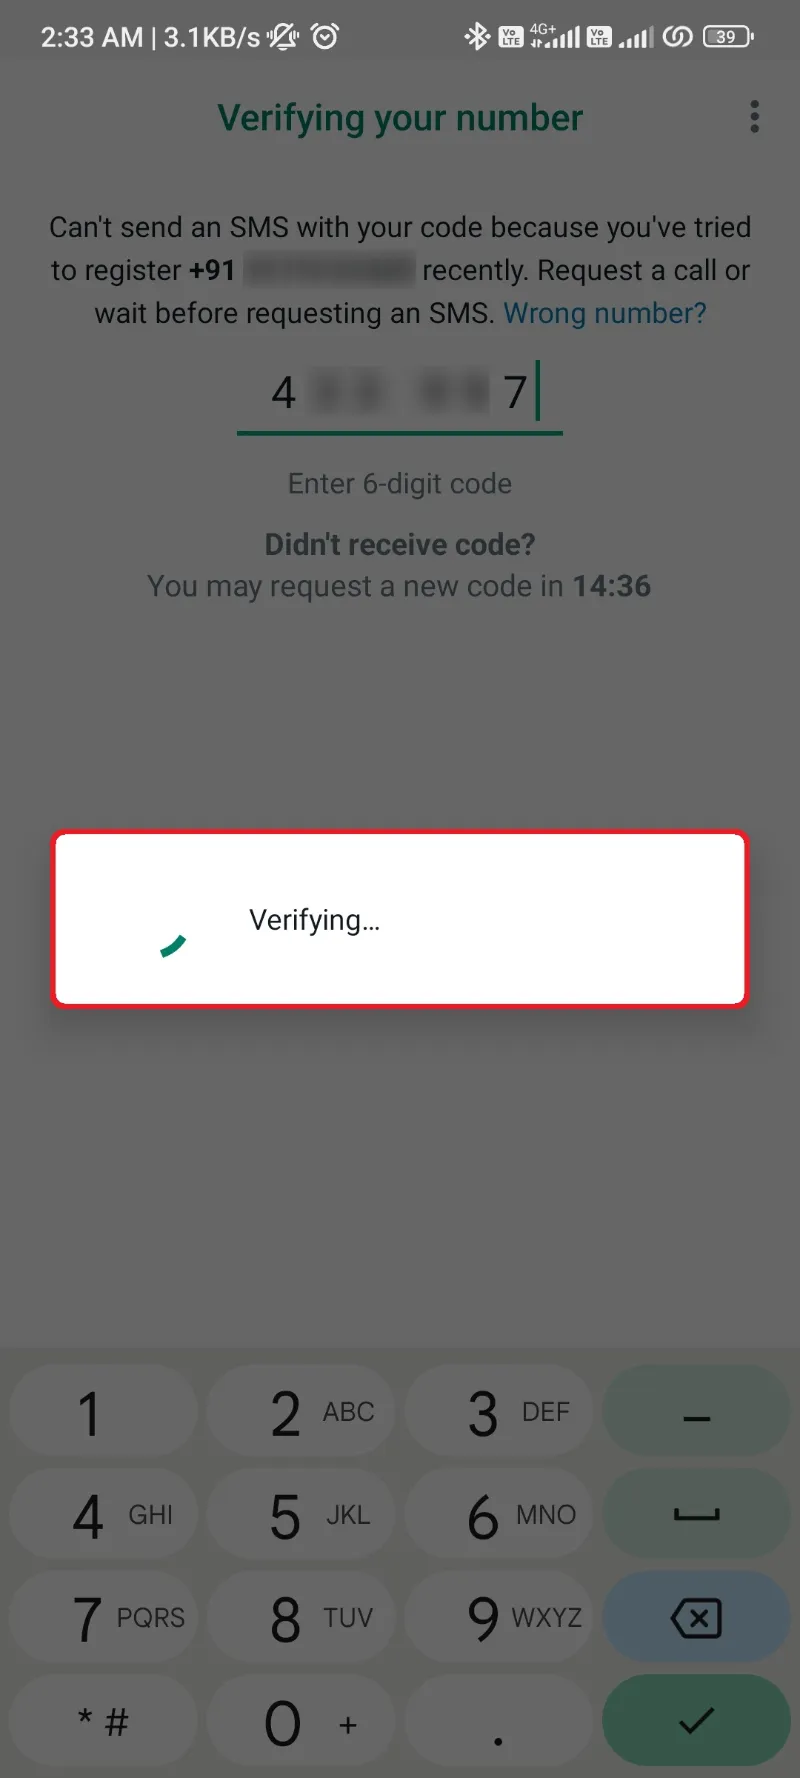
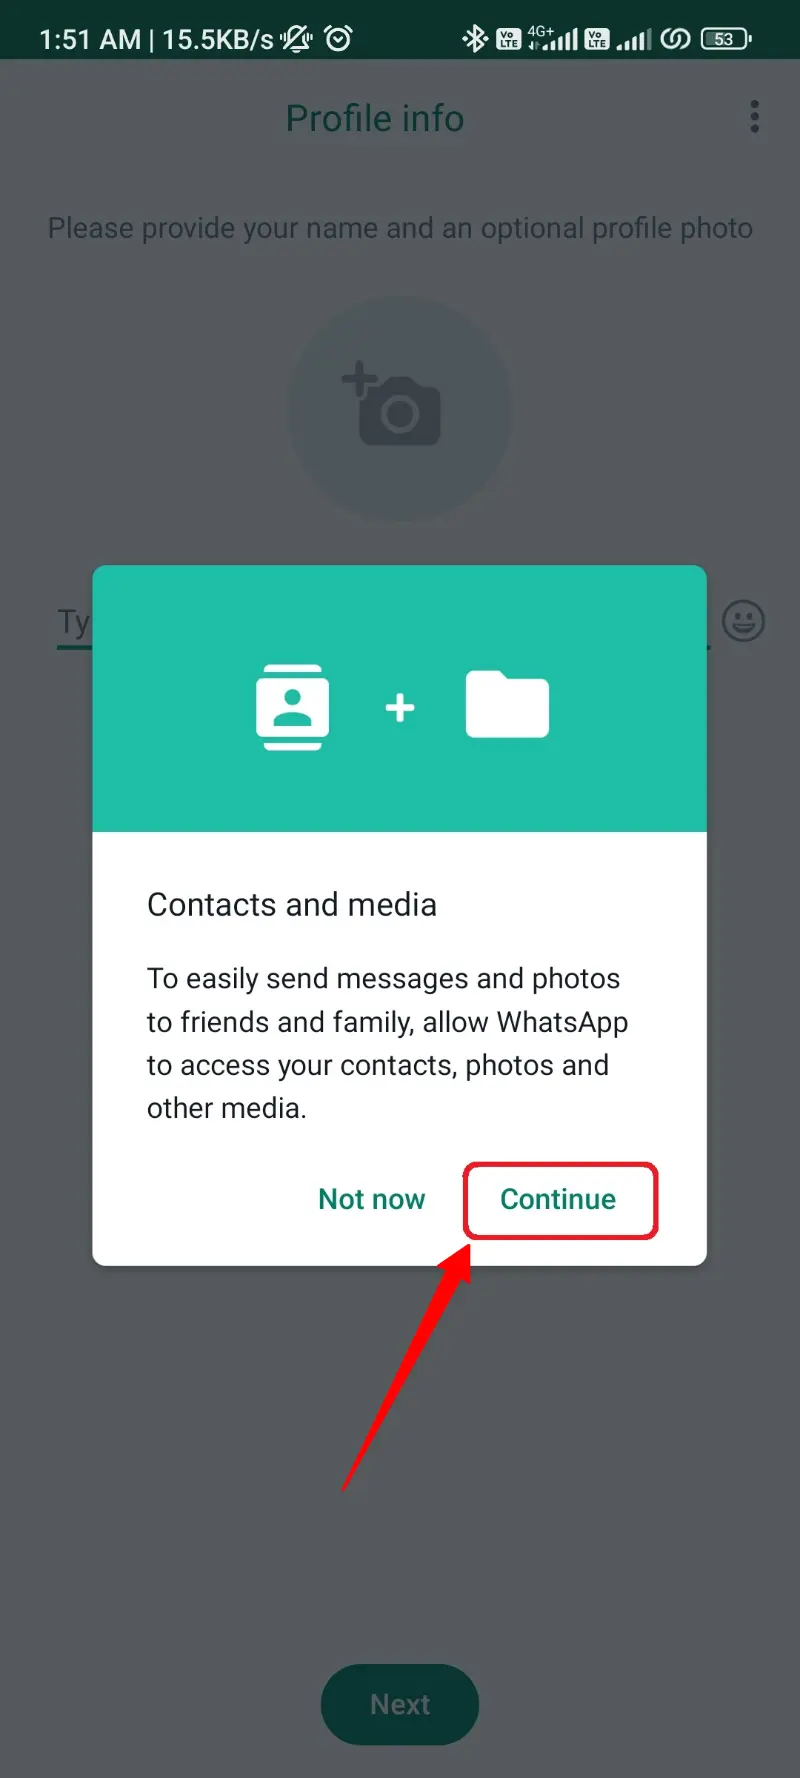
- Agree for essential permission of reading Messages for getting the OTP.
- Enter the OTP message and verify your WhatsApp account.
- Again, allow for the Contacts permission and skip the Google Cloud data backup.
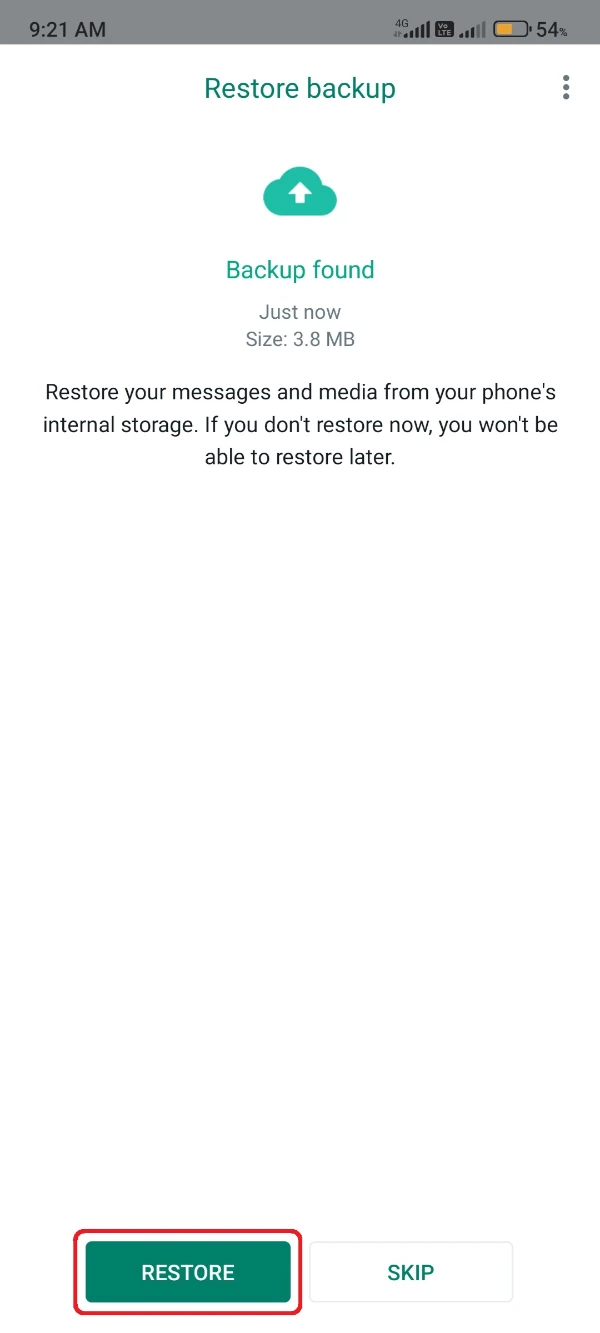
- After skipping the Google backup, WhatsApp will find this backup folder we created recently and show you the data available inside it.
- Click the Restore button for this data and wait until it get restored to WhatsApp.
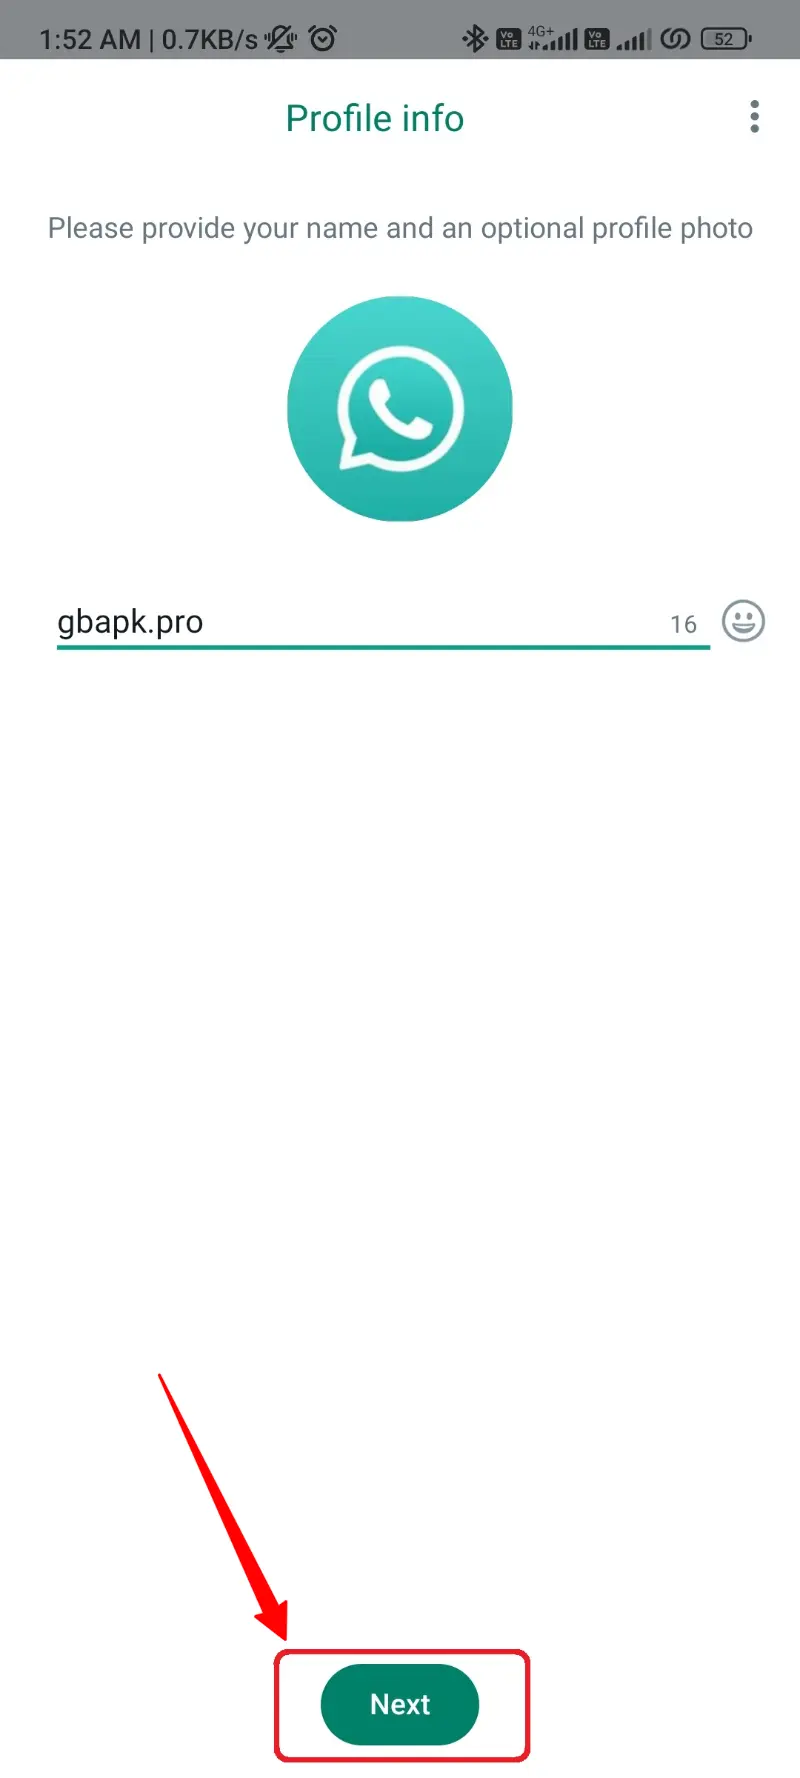
- After a successful restore, click the Okay button, and fill in your name and profile picture.
That’s all we had to do for transferring all the data from WhatsApp Plus to WhatsApp, or similarly, getting switched from WhatsApp Plus to WhatsApp.
There is more coming forward, so be pinged to our website for learning new procedures and methods related to do tweaks in WhatsApp Plus Mod.
You got switched successfully!